

With Manual rates mapping, customers choose from normal Shopify shipping rates, and ShipDock recognises the courier by the name of the rate. This guide shows how to create and name those rates. With the CCS options you set rates in ShipDock instead: see How to set up shipping rates.
Before you start
You need the Lite plan or higher to map rates in ShipDock.
Decide which couriers and delivery types you offer in each country, for example Packeta pickup points and DPD home delivery.
How to name your rates
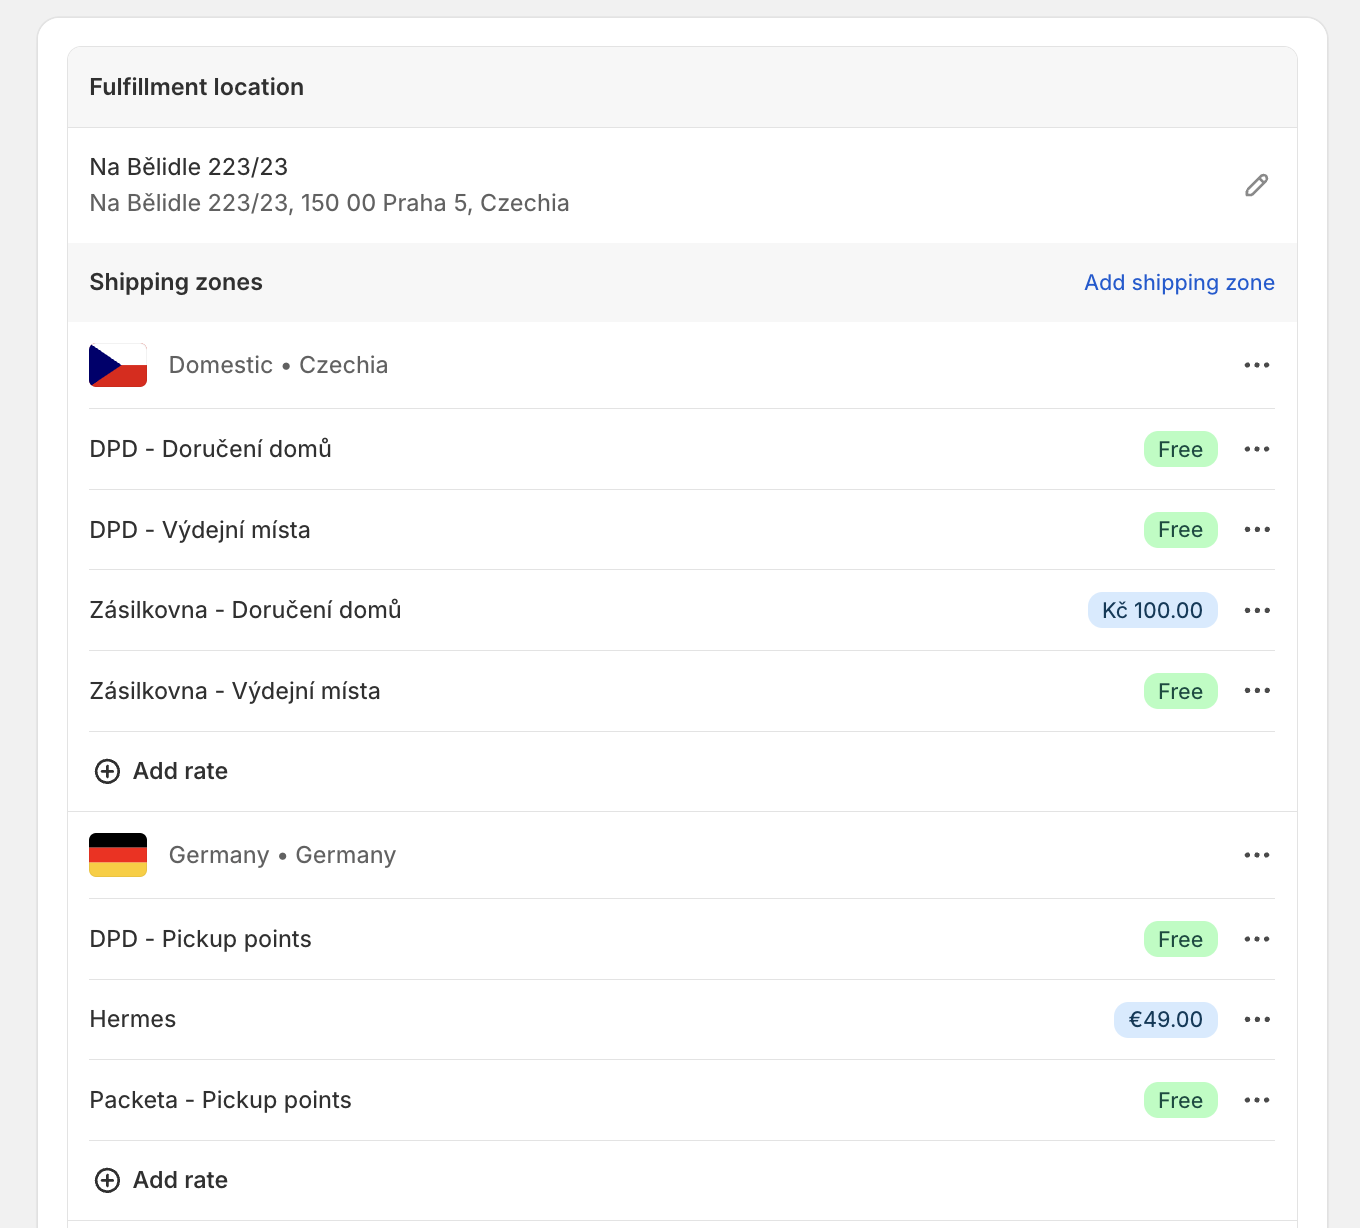
One rate per courier and delivery type, for example Packeta - Pickup point and Packeta - Home delivery. One rate name can belong to only one courier.
Never use the same name for a pickup point rate and a home delivery rate, in any country. The home delivery orders would be treated as pickup point orders.
Upper and lower case do not matter, every other difference does. Packeta - pickup point matches Packeta - Pickup point, but Packeta pickup point does not.
The same name in several zones is fine, and so is a different name per language, for example Zásilkovna - Výdejní místo and Zásielkovňa - Výdajné miesto.
Important: If you rename a rate in Shopify later, update the mapping in ShipDock too. Orders with a name that is not mapped are not recognised, and ShipDock cannot create their labels.
Create shipping rates in Shopify
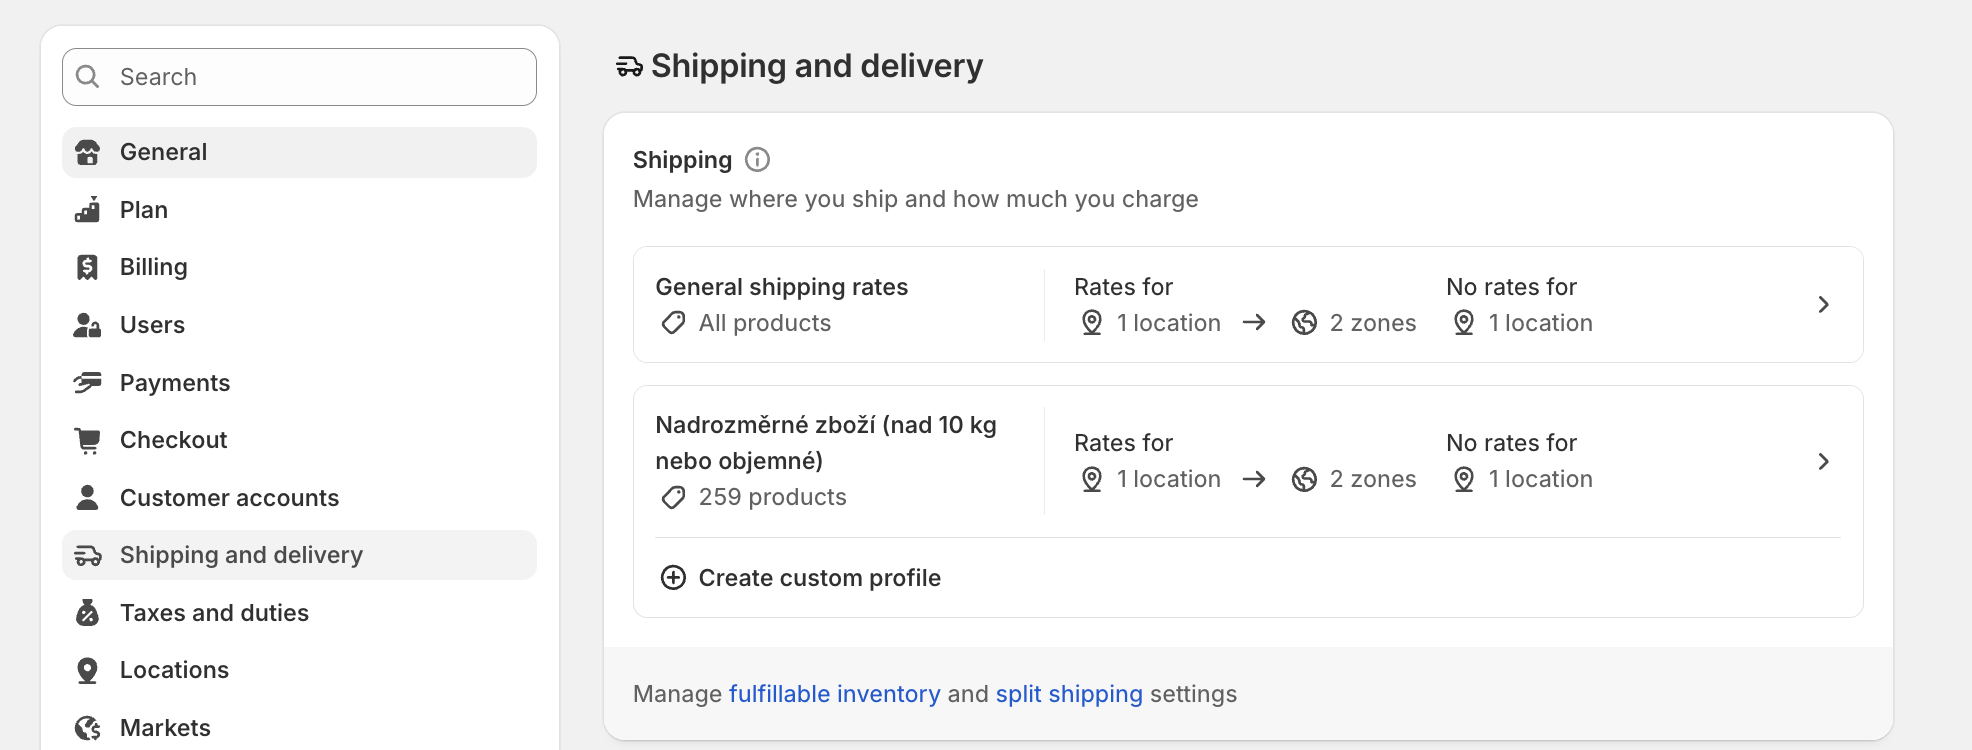
In your Shopify admin, go to Settings → Shipping and delivery.
In the Shipping section, click the shipping profile you want to add rates to.
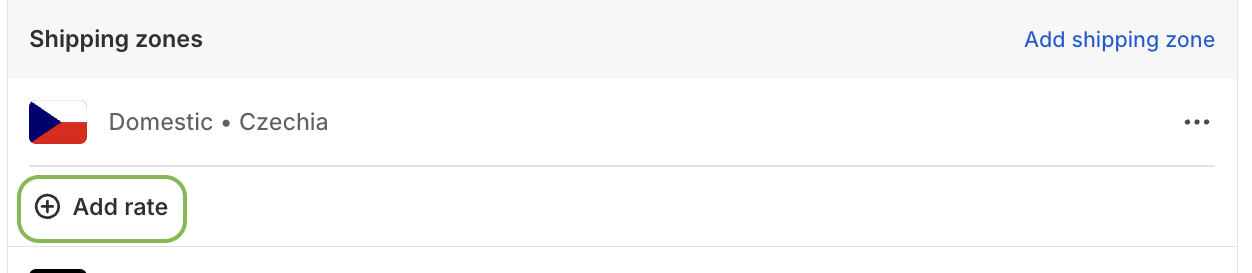
Next to the zone you want to add a rate to, click Add rate.
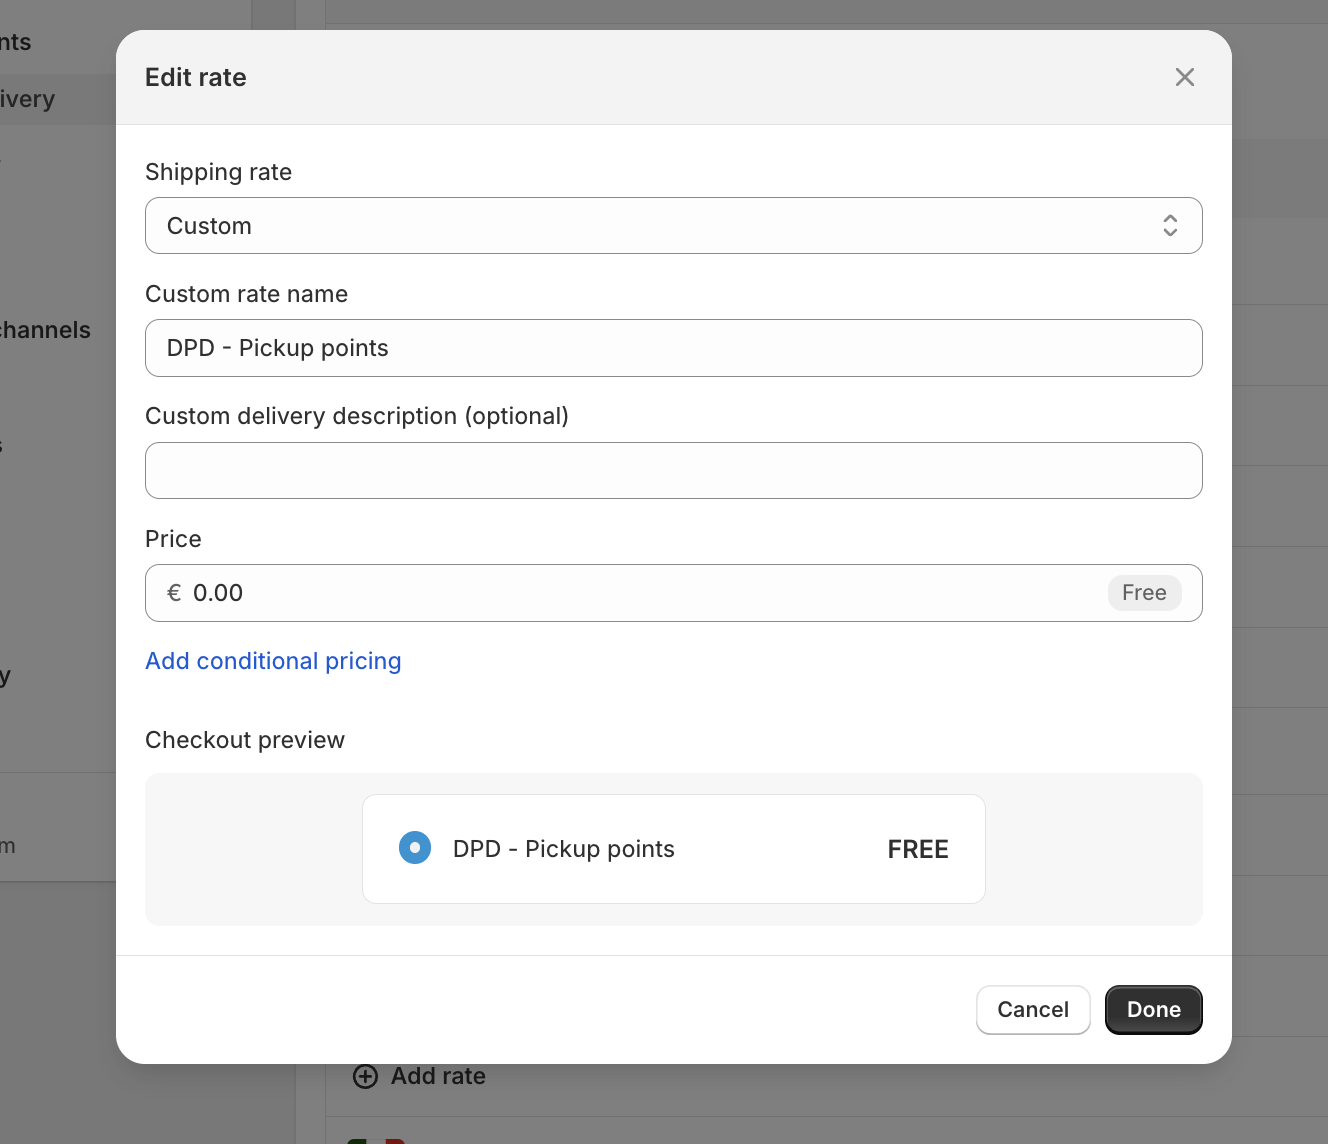
In Rate type, select Use flat rate. In Shipping rate, select Custom.
In Custom rate name, enter the rate name, for example Packeta - Pickup point.
Enter the Price. Optionally click Add conditional pricing for weight-based or price-based conditions.
Check the Checkout preview, click Done, then Save.
Repeat for every courier, delivery type and zone you want to offer.
Tip: For a pickup point rate on a store without Shopify Plus, use Custom delivery description (optional) to tell customers when they choose the point, for example The pickup point will be selected after you submit your order.
Next, map the rates to your couriers: How to map Shopify shipping rates to a courier.
Offer free shipping above an order value
Create the same rate twice, with the same name and different price conditions.
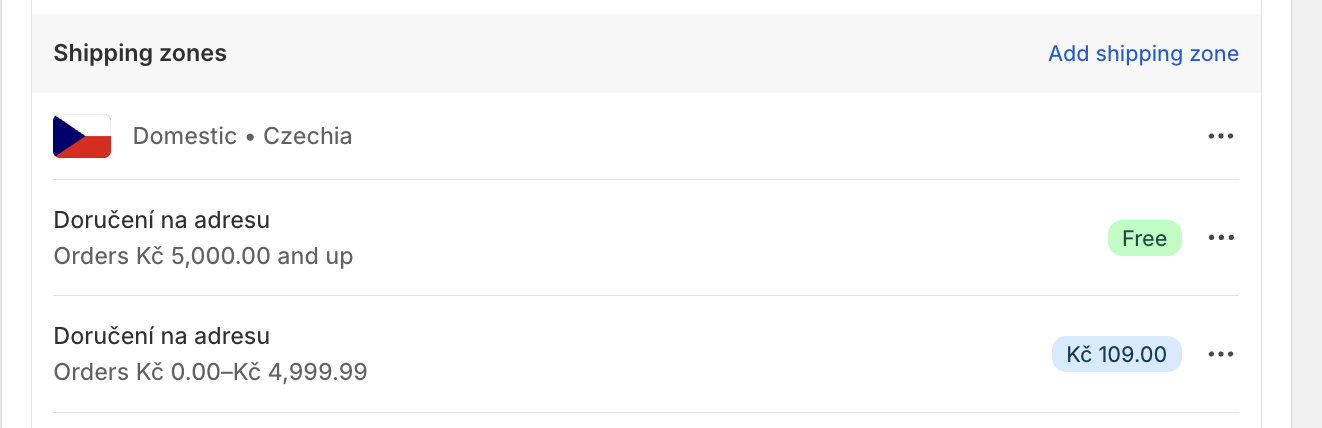
In each zone where you want free shipping, click Add rate and enter exactly the same name as your paid rate.
Set the Price to 0, add a condition Based on order price and enter the minimum order price. Click Done.
Edit the paid rate and give it a maximum order price just below the limit, so customers don't see both rates.
Click Save.
Because both rates have the same name, you map the name only once in ShipDock.
Limits
These steps are for stores with shipping zones. With shipping managed in Markets (market-driven shipping), create the rates as shipping options in each market; the naming rules still apply.
Troubleshooting
A new rate is missing when you map rates in ShipDock: check that the rate is saved in a zone or market, then click Refresh shipping rates in the Select shipping method dialog.
Label creation says the shipping method is not assigned to any provider: the rate name is not mapped, or was renamed in Shopify after mapping. Map the current name.
A home delivery order is treated as a pickup point order: the same rate name is mapped as a pickup point rate, in this or another country. Rename one of the rates in Shopify and update the mapping.