

With Manual rates mapping, you tell ShipDock which Shopify shipping rates belong to a courier, and whether each is a pickup point or a home delivery rate. ShipDock uses it to create the label and to show the pickup point widget.
Before you start
You need the Lite plan or higher.
Connect the courier first (How to set up ShipDock). For some couriers the Pickup points and Home delivery tabs stay disabled until the connection is complete.
Create the rates in Shopify, with different names for pickup point and home delivery: How to create shipping rates in Shopify for manual mapping.
Map pickup point rates
In ShipDock, open Providers, click the courier and open the Pickup points tab.
Under Choose integration, select Manual rates mapping.
In the Shipping rates mapping card, click Select pickup points.
In the Select shipping method dialog, tick every rate that means pickup point delivery with this courier. You can tick several, for example one name per language.
If a rate you just created is missing, click Refresh shipping rates.
Click Select. The card lists the rates under Shipping method name.
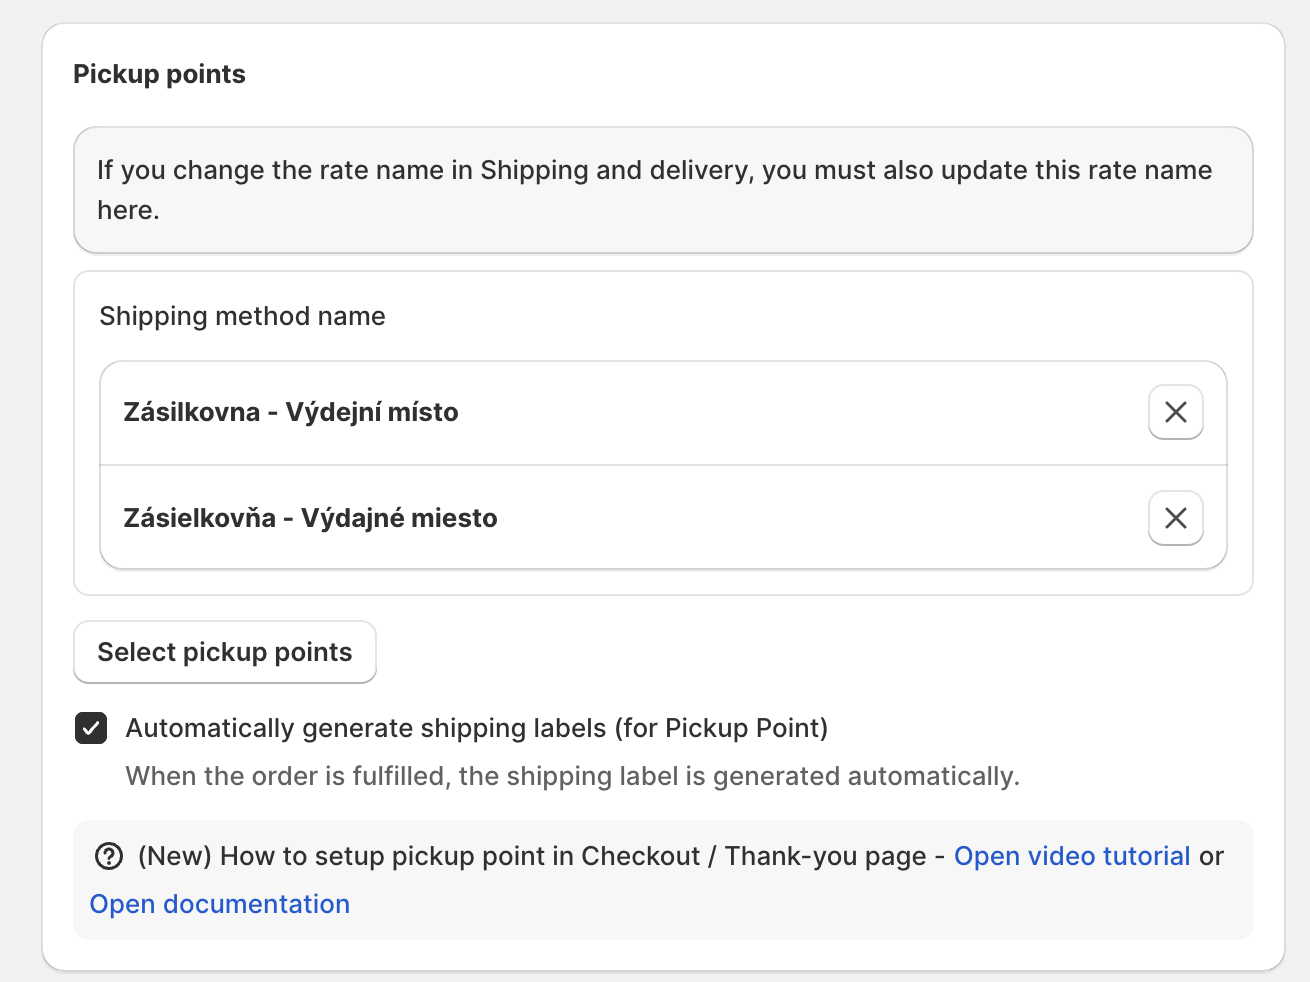
Save the courier.
Add the pickup point widget: Thank you and Order status pages, or on Shopify Plus checkout.
Tip: Add custom lets you type a rate name that is no longer in Shopify, for example after you renamed a rate. Older orders with that name are still recognised.
Map home delivery rates
Home delivery rates are mapped per country, and for each one you choose the courier service.
In the same courier, open the Home delivery tab and select Manual rates mapping under Choose integration.
Click Add delivery. A new row appears.
Next to Shipping method name, click Select. In the dialog, pick the rate under the country it is for, then click Select.
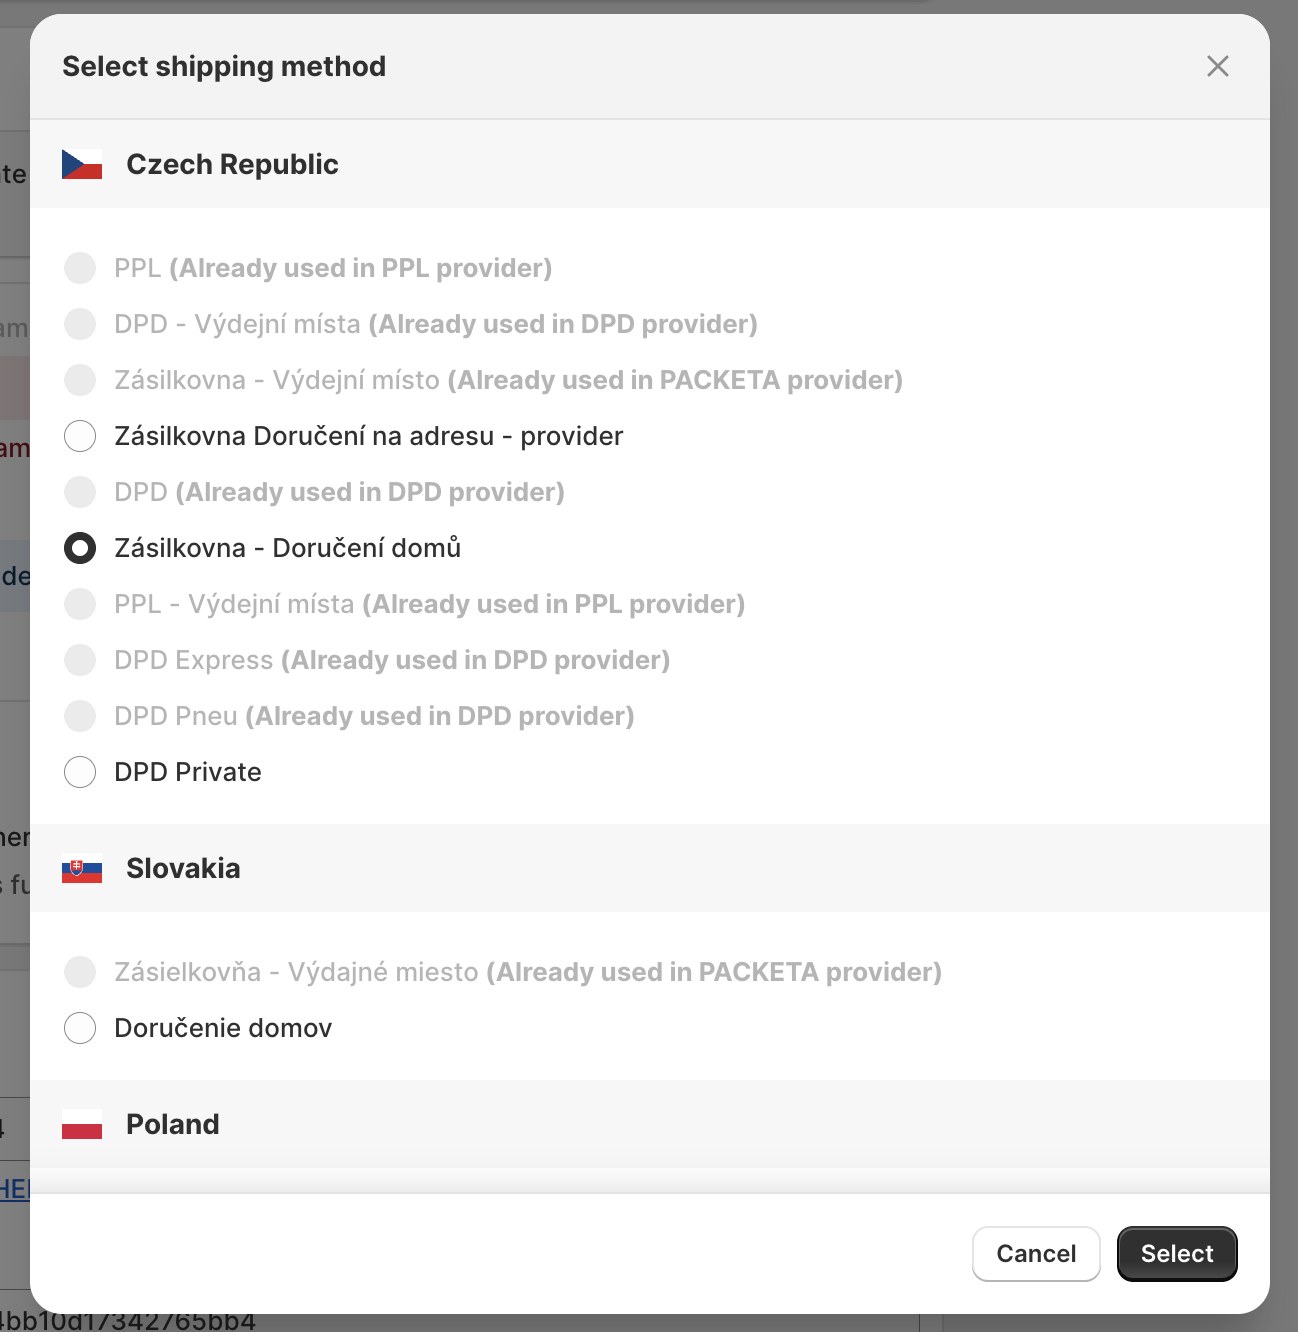
ShipDock fills in the Country. In Carrier, choose the courier service for this rate.
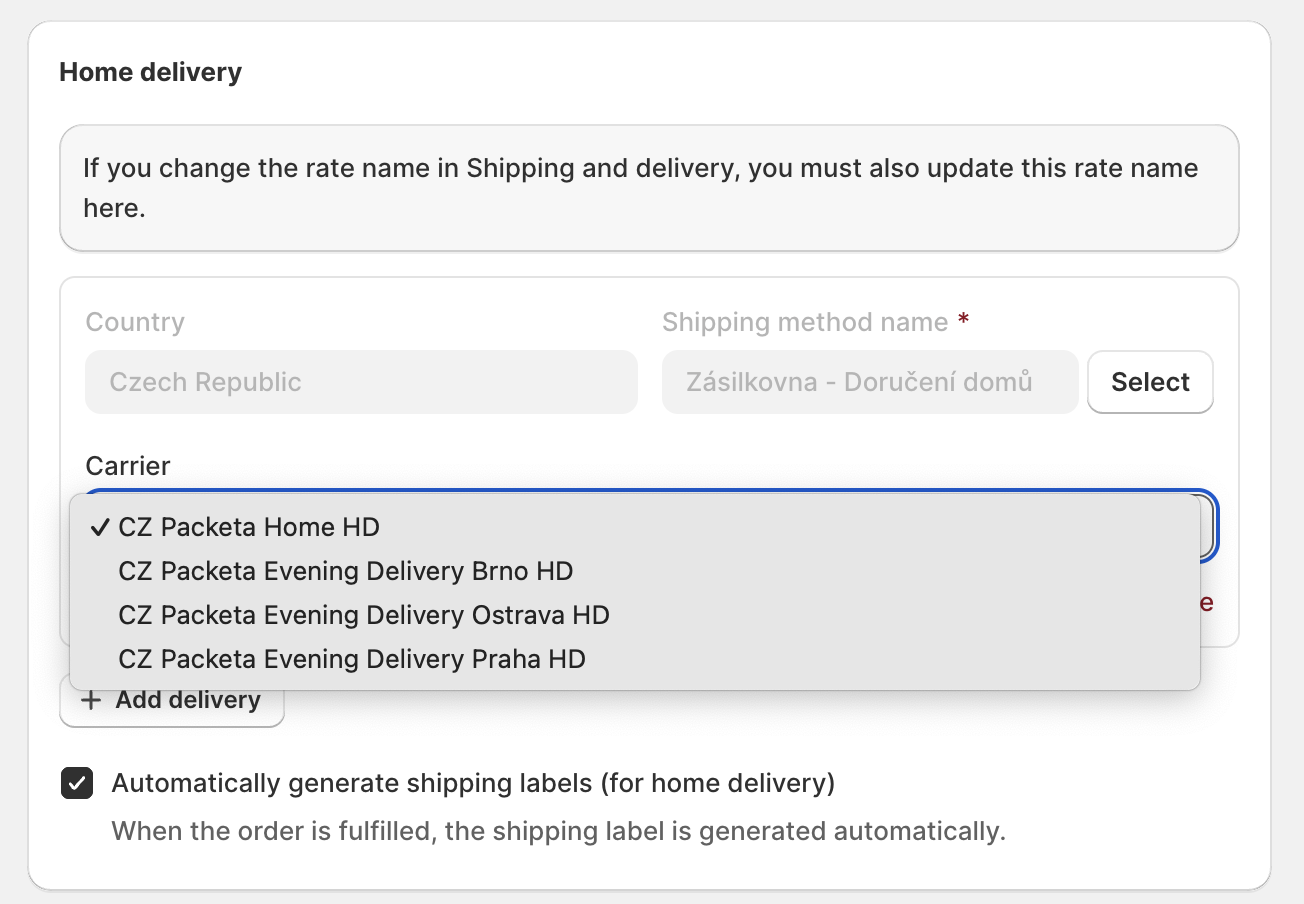
If the courier offers extra services for this service, tick the ones you want for every parcel with this rate.
Repeat steps 2 to 5 for every home delivery rate and every country. The same rate name in two countries needs a row for each country.
Save the courier.
To stop using a rate, click Remove in its row. The two card screenshots show the older layout: the card is now called Shipping rates mapping.
Limits
One Shopify rate name belongs to one courier. A rate mapped to another courier is greyed out with (Already used in … provider).
A rate mapped as a pickup point rate cannot be picked for home delivery. Pickup point names are checked first and apply in every country.
Rate names must match: upper and lower case do not matter, any other difference does.
DHL Express (on request): its pickup point dialog works Per country, you tick each rate under the destination country it applies to.
On stores that manage shipping in Markets, the dialogs list the names of the shipping options in your markets.
Important: When you rename a rate in Shopify, select the new name here too. Until you do, new orders with that rate are not recognised. A red warning icon marks a mapped pickup point name that no longer exists in Shopify.
Troubleshooting
Label creation shows "The shipping method … is not assigned to any provider.": the name is not mapped, was renamed in Shopify, or is mapped for another country. Map it, or choose a carrier from the icon in the message.
The rate you need is not in the dialog: click Refresh shipping rates and check that the rate is saved in a Shopify zone or market.
The pickup point widget does not appear after ordering: the chosen rate is not mapped on the Pickup points tab, or the widget is not added yet.